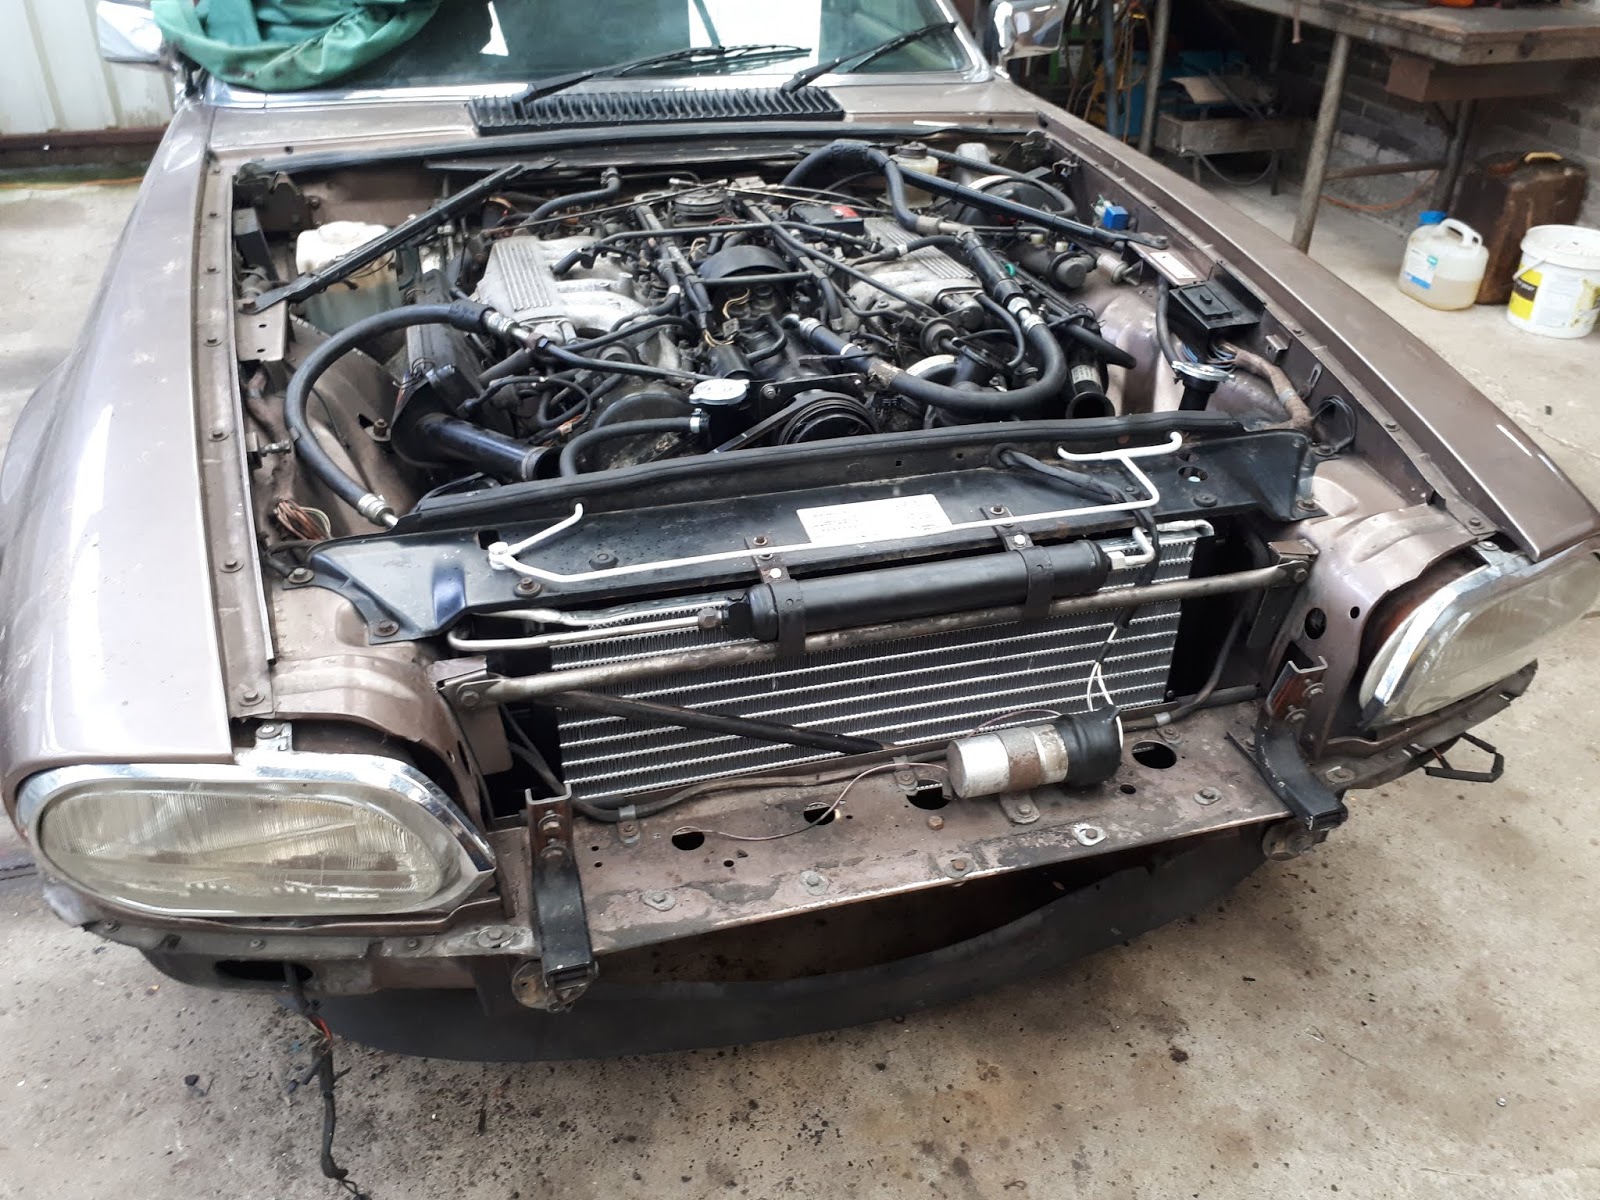
Friday, 19 April 2019

Headlights trouble, waterhose leakage fixed and last 6 spark plugs replacement

Finally some progress again. Today is a bank holiday at my work, so a day off which I spend on various things. First I went to the car parts shop and bought the new bulbs. To my surprise the new bulb did not work. Sigh! Checking and checking but I couldn't find the culprit. I suspect some kind of broken cable somewhere but the wiring harness has not been touched when doing all the other work on the engine. So I placed a new wire to the other side and presto it's working. Hard to believe there is a wire broken though. When doing further light checking I now noticed the normal light is no longer functioning? What is going on? And even more strange, the high beam is working but failing on the other side. Weird. I need to furhter look into this.


And last week I spotted as well a new coolant failure! GRRRR!!


 I was fearing this and mostly fearing it was leaking around the new waterpump. But when checking I found it was a the lower waterhose.


 At the time I had to buy a new larger clamp and I placed it such that I could reach the mounting screw. I suspect I did not screw it tight enough. So I fixed that and it looks like it's running leak free now:


One more thing I had to sort out is to replace the other 6 spark plugs. So I had checked the internet for advice. I have been reading about crafty people making specific tooling to reach the plugs. I wonder how they managed to do that. Knowing the other plugs were severely stuck I did not want to cause any damage with a adjusted homemade tool. Others dismantled the fuel rail which seems the best way to do it - a lot of work though. On closer inspection I figured I have only to remove the coil and the "gas mechanics" and leave the fuel rail in place. It was going to be a fiddle job but I checked if I could reach the screws on the bottom that holds the housing for the "gas mixture mechanics". Looks like this was possible. So here goes:


First have the coil removed. Disconnected the wires and unbolt the 2 scews, easy. 


 With the coil removed you can now easily access the 2 screws at the bottom that holds the housing


And the other side of the housing, these screws are slightly more difficult to reach:


For this I used the small wrench with 2 extenders and 1 cardan holder to make the corner to reach both screws:


And there you go, the housing came off pretty easy. Of course both gas rods had to be taken off as well, easy. Everything else can stay intact.


With the housing off all 6 spark plugs can be easily accessed.


With the large wrench and a plug socket they could be properly removed using appropriate force


These came out much easier then the other ones.


I did soak them a little with WD40 and afterwards I cleaned it with a blower pistol which I bought new at the shop as well.


And here you have the little buggers:


No wonder the maintenance costs is so expensive for silly jobs like this. Glad I managed to do this myself.

And when starting up the engine it ran very smooth again. Happy with this. Now only the headlights to be sorted.


Saturday, 6 April 2019

Headlight bulb replacement

Last weekend I noticed the citylight was broken in the headlight. Clearly that would be a MOT fail. I had a quick look and couldn't figure out how the headlight was mounted. The headlight needed to be taken out as there is no other way to replace the bulb. Clever.

So I had the manual checked to see how this is done:


So yes, remove the chrome trim first, easy. Then you will see at left side there is a black clip, with two "clips" / "levers". With a screw driver you can push them aside and it will release the spring holder. So don't touch the screws that holds the mechanism.


Same story at the bottom side of the headlight:


And then the headlight comes out (it's also held at a third holder at the right but that one you don't need to unclip - you can't reach it either):


As the shop was closed late afternoon I will get the bulbs next weekend and get both headlights done.

Sunday, 31 March 2019

Airco wire harness + blinking light cable placement

A blog without photo's. I was tired today due to other car issue's. When I had some time left I finalized the airco harness placement for the XJS and also the wiring cabling for the right side bumper. Just a 10 min job and I couldn't be bothered to make photo's … happy with the result though.

Yes, it finally arrived on the 2nd attempt earlier this week. Clearly this was all the result of  a failure by USPS. Not to mention the slow shipment. I had other parcels send and received in 4 days by other shippers from the USA to the Netherlands.

The seller was very kind and made me a good deal. On the first deal I only ordered the airco harness for a very good price. In fact, the shipping costs were twice the purchase amount! And then taking up more then one month to discover it was in transit in the Netherlands, never arrived and got shipped back to the seller. On the 2nd attempt I also ordered this cable for the blinking light in the bumper since that was in a terrible state (see my blog somewhere else during the dismantling). So again, I obtained it for a very decent price. And now both items could be shipped in one package. The seller paid out of his own pocket addtional Insurance to Ensure it would arrive and have better tracking option. Well, this time it worked out.

Many thanks David! Buy with confidence from this seller: Shop Everday XJ .com :

https://shop.everydayxj.com/Default.asp

I will add him to the sidebar as reference for parts.

Update 1-4-2019: When going through my archive I found these which I used for my search and checks. So some photo's after all.


Typical enough, shortly after I purchased this item someone on FB posted a NOS harness for sale: 


Tuesday, 12 March 2019

Clarion owners guide / manual - DAC 3716 / Model PU-9037C

I purchased this manual recently. I have scanned it and it's now available in my download folder - both in Word and PDF format. The PDF file is somehow less sharp hence I included the Word file too.

Sunday, 10 March 2019

Build up - the final stage.

I can't believe it, the ordered airco wiring harness is shipped back to the USA! I'm unsure why but I'm guessing the address or zipcode might have been wrong. Let's see how this will work out.

In any case today I finished the build up of the car. Starting with placing back the bonnett and struts:


Next the side bumpers and the bumper cover plate:


Putting back the front upper grille:


And the bumper and the lower grille:


And making a very short test drive. The weather was crap so I only drove 1 kilometer or so. All looks promising and the engine runs so smooth. Love it.


So I guess the next thing to arrange is the MOT and filling up the airco. Due to work and holiday leave this likely will be done by the end of this month.

Sunday, 3 March 2019

Build up - more waterhoses, reservoir tank, wiring, dryer, cover bar, coolant and starting up

I can't believe it, I still haven't received the airco wiring harness (we are almost 4 weeks further). I got a message last week stating it now has passed the Dutch customs but it's still stuck in transit and not further shipped to my house, sigh!

Nevertheless I completed the build up further today. I had this specific AC pressure switch ordered as I want to be sure it's new and functioning ok (as I have no idea how to measure this item).


Mounted, only the wiring to be connected up:

I had also 3 screws orderd and now I was able to mount the new reservoir tank. I had also new caps included with the order. All looks nice and shiny now:


Refitted the fan so the wiring is now on top. And furthermore I mounted all the remaining waterhoses.


But I got 3 left which I was unable to identify, turend out these are waterhoses for the heaters, so maybe a job for another time.


Mounted the coverbar, the overflow piping and the dryer. The dryer barely fitted since it has slightly different sizing.

Mounting the condensor to the top coverbar did not work out 100% but it fits Ok except for one small screw.

All looks good and fine now.


And time to start! YES! it started in one go like it was yesterday. It ran very good, no noises or whastsoever. So time to fill it up with coolant:


Running again and unfortunately it started leaking:

NO! luckily it was at the banjo bolt. I had a new copper spacer used but likely I didn't  screw it tight enough.


On the 2nd run it ran leak free, phew! It's running very smooth, really pleased with it. It's still running a bit high on idle (1000 rpm) but am sure on a longer run and warmed up properly it will run a lower rpm..


So next time I can do the remaining pieces; the grill, bumpers and bonnet. And then do a real test drive.

Sunday, 24 February 2019

Build up - temperature sensor, waterhoses, fanshroud, radiator and condensor

Yes! Finally the parts arrived earlier this week; the new reservoir tank, the reinforced hosekit and the temperature sensor. So additionally I bought 25 liter coolant. I looked it up and apparently the sytem has 21 liters of coolant:


I also had to buy seperately the new hose clamps:


I figured to buy a new sensor as well as it's a cheap item but also to avoid future replacement as that will cause a huge spill of the coolant.


It's also a very easy and rewarding task to replace:


Then onto the new hoses:


Then I found out it was impossible to mount the first waterpipe since the belt was preventing it. So I had to undo that and free up the tensioner again.


It was still a fiddling job but in the end all was placed accordingly. Looks so much nicer now with the repainted waterpipe and the new hoses and clamps:


Then placing the fan shroud. Again I'm very happy with the proper paint job of this item:


Next item, placing the radiator.


And consequently all the hoses:


One problem though. One hose clamp was not large enough. Exactly the one on the toughest location, the bottom hose at the engine location. So I need to source another one, sigh! 


And then placing the condensor. This required a little bending of the pipe to the hose but luckily this went fine.


So this looks quite nice now. But as Always another small problem popped up. The new reservoir tank could not be mounted due to missing screws (inch format - grrr!). I'm pretty sure they were still on the old one which went to the painter. And I suspect he had taken them off and likely they are gone now. So I now need to source them. Hopefully SNG Barrat has these as I think I will order 2 new caps for the radiator system.

Next I need to order one large hose clamp and more annoying, I'm still awaiting the airco harness which I ordered on the 5th of Feb. When checking I find out this item already arrived on the 9th in the Netherlands and has since been stuck in transit! (www.usps.com - LZ491983245US). Sigh! And I also need to refit the fan in order to get the wiring correctly on the top side (sigh!).